There are several reasons to create DIY talking head videos for your business. Most importantly of all, it’s inexpensive. In fact, if you already have a modern phone, there can be no expense at all. And it’s totally doable. But there is a major difference between simply making content and creating great video content.
Don’t worry. That’s what I am here for. With more than two decades of experience in the television news and video production businesses, I have some very simple tips that can make your DIY talking head videos shine. I won’t waste your time getting too technical, and I’m not going to list items you need to purchase (although I’m happy to share suggestions if you’d like).
DIY Talking Head Video Tips
Camera Settings
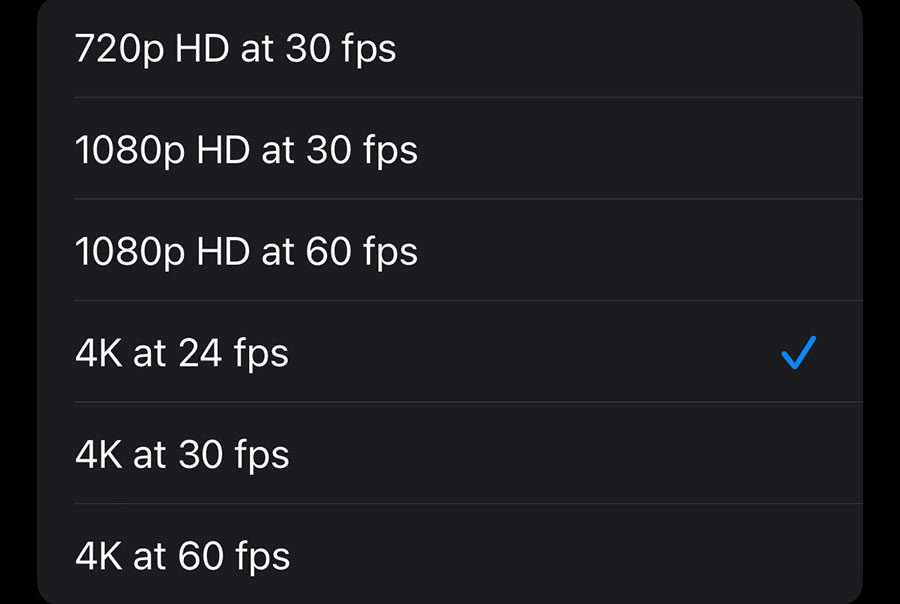
Before you jump into anything, make sure your camera settings are correct. This is creating your foundation for success. If you are using an iPhone, DSLR or really anything else, you should have your camera set to 4K or 1080p at 24fps or 30fps. The higher the resolution, the larger the file size but also the most flexibility in editing (if needed).
Framing
Honestly, my best advice is to have someone shoot the DIY talking head videos for you — or at least frame the shot for you. The best camera on your iPhone is the rear facing (non-selfie) camera. Using someone else will guarantee that you are in frame. If you don’t have someone to frame your shot, then you can simply use the selfie camera or shoot in 4K. Shooting in a higher resolution will allow you to punch in or level your shot in editing.
Use a Tripod
When making DIY talking head videos, use a tripod or something else to stabilize your shot. There is a time and place for holding your camera out and shooting a talking head video, but that content should be more spur of the moment or created for Instagram or TikTok. If you don’t have a tripod, then set your camera on something that will hold it up. A set shot is the best shot for your DIY talking head video.
Eye Level
Be aware of your eye level when creating DIY talking head videos. You want your eyes level with the camera. Don’t have the camera down in front of you. No one likes being looked down upon. And the same goes for looking up. You want to be looking straight ahead at the camera. This is often an issue when someone uses their computer camera on Zoom. You want to mirror what you see on the evening news.
Natural & Artificial Light
Use natural and artificial light to your advantage. Never have your back to a window. Sure it might be a beautiful setting behind you, but you will be extremely backlit and impossible to see — unless you have enough artificial light in front of you. Snap all the lights on in the room; windows or not. And ideally, face a window to allow the natural light to light you. Yes, color temperatures can become an issue — but I told you I wouldn’t get too technical. You’re simply doing it right if people can see you clearly.
Use a Quiet Room
Yes, there is an obvious side to this tip. Why would you use a loud room full of people and no microphone? But, I also mean staying away from rooms near the road where you can hear trucks or motorcycles rumbling by. And on top of that, avoid cavernous rooms with high ceilings. Big rooms cause echos. And use a room with carpet, because carpet helps absorb sound. If you’re not wearing a microphone, eliminate as much noise as possible to make sure your message gets through.
Use a Creative Background
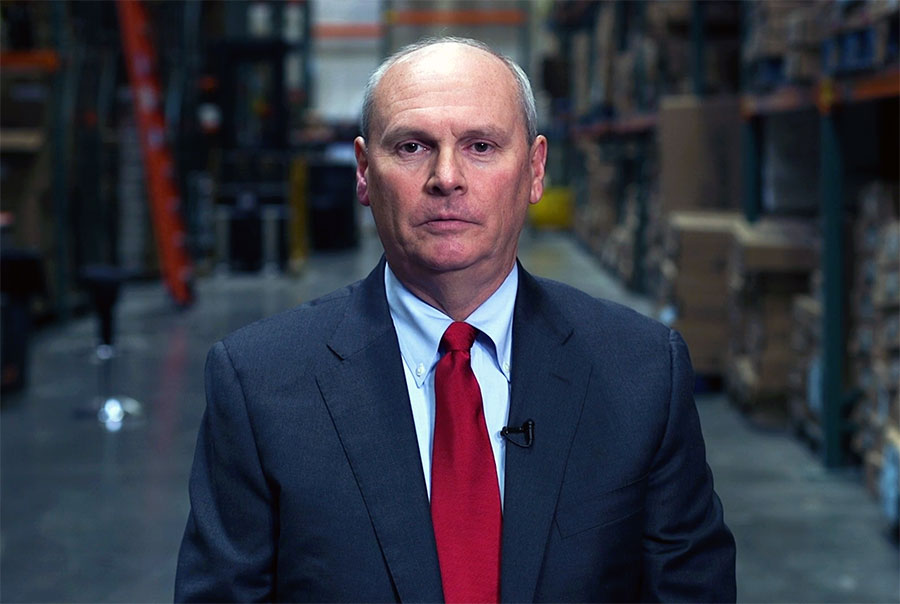
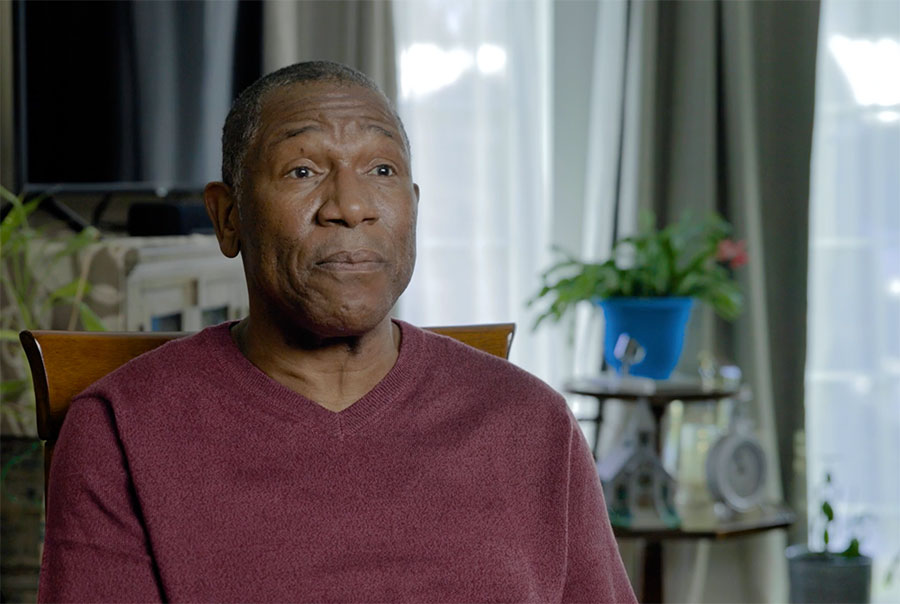
Use a creative background when shooting your DIY talking head videos. There is nothing more boring than a white wall. At the same time, don’t get carried away with the background. The last thing you want is a background that will distract people. You need to be the focus of the video. And as an added tip, add depth of field by sitting in the middle of a room and not directly along the wall. Depth of field means you will be in focus and the background will have a nice blur (see image below).
3, 2, 1 Countdown
Start your DIY talking head videos with a 3, 2, 1 countdown. And make sure you pause for a second before starting to talk. This will make editing your video so much easier. And once you’re done talking, maintain eye contact with the camera and don’t stop recording for 3-5 seconds. That will allow for the cleanest looking video possible and gives flexibility for editing in a logo, etc., if you want to.
Don’t Forget to Smile
You might be nervous when recording your videos but it’s important to smile. Your message is important but so is your presence. You likely bond with people who have personality. Don’t be afraid to show your personality on camera. On top of that, speak loudly and clearly. And don’t be afraid to have energy. It’s always better to have too much energy and tone it down as opposed to no energy and ramp it up.
DIY Talking Head Videos
Not only is creating DIY talking head videos possible. It’s possible to create them well. And there are very simple things you can do to make them great. And as my high school basketball coach said, “Perfect practice makes perfect.” Keep creating and keep putting yourself on camera. The more reps you do, the better you will get.
And if you really want to step up your game, you can turn to a professional video production company like Moarly Creative. We love creating content for businesses small, medium and large. And there isn’t a type of video we don’t make for companies or nonprofit organizations.
Please feel free to contact us by phone, text or email with your video production needs. You can also reach out to us on Instagram, Facebook, Twitter and LinkedIn. Or you can watch our video production work on YouTube and Vimeo for business video ideas.
MORE DIY VIDEO PRODUCTION TIPS FROM MOARLY CREATIVE: